Friday, January 3, 2014

So Far--So Good!!!!

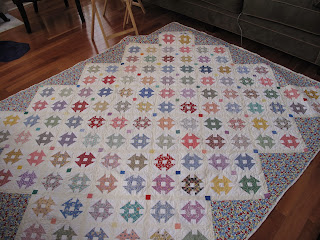
I completed quilting one of the quilts on my 2014 "To Do" list--- one of three quilts that belong to Diane:


I used a edge to edge pattern board.  It turned out  nicely I think----the thread matches so closely you really can't see the stitches on the back.    I hope she likes it---when washed, it should crinkle nicely.

I also started working on one of my UFO's from 2013:


Last year (and the year before as well), I got into this "old shirt" kick.  I purchased plaid cotton shirts from Goodwill and cut them up (ala' Bonnie Hunter).  I also purchased a Drunkard Path Go! Cutter die and started a quilt using the plaids and the die.  I put it aside after a couple of blocks, not really sure why.  It is my hope to finish a new quilt for my Grandson.  The pieces look sorta wonky----I like that, and I have to be careful when pressing since the fabrics are easily stretched, but it should be nice once finished.  The die results in a 7 inch finished block so together, the entire block is 28 inches.   I have to be careful as I lay the pieced strata on the die for cutting since I need some going horizontal and vertical.  I like the circle that appears once the four are sewn together.  Hopefully I can maintain the energy.


Wednesday, January 1, 2014

Happy New Year!

Happy New Year everyone!!!!  My husband I are were talking over coffee this morning and remembering when we thought 1960 was really a "long way away".  Wow---2014----I never even imagined this far ahead when I was younger.  We also discussed all the changes we have observed in our lifetime thus far---WOW!  For example, my husband got a watch phone for Christmas.  Doesn't that sound like Dick Tracy or Star Trek :)  Now it is a everyday thing.  We had an absolutely wonderful Christmas Holiday---all five of our adult children were here with 6 of the 7 grandchildren.  Such fun!

We brought in the New Year as we have done for at least 20 years!  At home, watching TV.  We had dips and chips, and toasted the New Year in with a small glass of wine.  No partying, no giant crowds, just giving thanks for having seen another year.

Like everyone else, I do make resolutions---often the same ones carry over year to year.  This year I resolve to:
  1. Lose 15 lbs.  To do that I will---
    1. Eat better
    2. Exercise
    3. Use my juicer
  2. Shop my stash before buying fabric
  3. Quilt the 10 quilts I have waiting (before I start another quilt)
    1. 3 of Diane's
    2. 1 that belongs to Roz
    3. 6 that belong to me
  4. Complete my UFO's (I think I have a total of 5 in the Que).
  5. Enjoy life as it comes
  6. Not take myself (or anyone else) seriously (unless a life is involved).
  7. Blog more regularly
This is my beginning list----I may add (or delete) as I go along. 

I did well in making quilts in 2013---a total of 22 with 11 donation quilts.  Several though are among the 6 I need to quilt.  I did decide to end the year by making a quilt though.  I small one that will be gifted to someone or become one of my donation quilts.

It is a Disappearing Nine Patch.  The center square was a solid white, the remainder from two different charm packs.  I made a nice size crib quilt---perfect as I said, for either gifting a new baby or as a baby donation.  I also made a quilt for a fellow nursing professor who just had her first Great-grandbaby.


It looks very much like the first quilt---but is a little more "scrappy" in appearance.  It also was made with charms---the same group as the first quit (I guess that is why they look similar to me).  It is all quilted (with a backing of yellow minkie), bound and I will give it to her when we go back to school next week.

I hope your New Year began well and the day is a great one.  I am busy cooking the traditional dinner (for my family), Black-eyed Peas (for luck); cabbage (for money) and ham.  I am adding homemade rolls and rice.  No homemade dessert though, we have leftover "purchased" pies my daughter brought.  I plan to getting started on quilting those quilts.  Have a great day!

Sunday, December 8, 2013

It's My Birthday!!!!


As a birthday gift, my youngest daughter took me to the Smoky Mountains for a couple of days to relax and rejuvenate at a really nice resort.  This was the view from the living room balcony.  I loved these tree's---they looked so graceful and wise.  It is winter so the grass is brown---but it looks like sand to me.

At any rate, I had a wonderful time!  I got a 50 minute massage---the masseuse had to wake me up and tell me "our time was over."  We shopped and ate at some great restaurants.  I did lots of walking, and enjoyed the time out even though it was cold and rainy.  I got lots of bargains and we spent time laughing and exploring.

The time away gave me an opportunity to really think and take stock.  I have reached an age that my mother didn't reach and one sister didn't.  I think I have accomplished a lot and realized some real successes although I rarely share them with others.  I have made a promise to myself to really try to enjoy life and to really worry less and to just "let it happen."  .  I am going to work really hard at being happy.  Now I know that happiness is a state of mine and is defined differently by everyone.  My happiness is really perhaps more like a peaceful state---I love peace!  That is what I am working toward.

On a less "heavy" note-----This will be the first Christmas in years that all five of our children will be home for Christmas.  This gives me something else to be thankful for.  I am so looking forward to all the laughter and "cutting up".  All the childhood adventures and tales that will be shared around the table.  Just thinking about it makes me smile!  I am busy making REAL napkins for our Christmas dinner.  That really sounds sorta weird, since our plates and eating utensils will be plastic (but it is "nice" plastic).  I am using my embroidery machine and they are turning out nicely.  I have completed ten and have ten more to make.  The grandbabies and I will also be making Christmas  ornaments  for the "kids" tree.  I have assembled everything and next week after the Guild Christmas Party we will begin.  I think I am more excited than they though---:)

I am so very thankful and feel especially "blessed and highly favored" when I look at my life.  I plan to enjoy it even more!   Happy birthday to ME!

Thursday, November 21, 2013

Checking In!

I have not been a very responsible blogger I know, but I haven't really had anything really interesting to blog about.  Life has been going on and I have been trying really hard to keep up and maintain my head above the fray!

I have though managed to do some quilting---that is what has helped me "keep up."  Every Christmas I make pillowcases for my grandchildren.  Last year I embroidered their names on them, not so this year.  The material is rather busy and I think the letters would get lost.


These are for the "Grands"---The little snowmen are for the girls, the reindeer for the boys, although really they would work for either I think.  Both of them have the peppermint for the cuff---you see how this might be too busy.  I made a total of seven.

These are for my bed and the guest room.  A total of six.  The print is scrap.  I put it on the back of a quilt I made a couple of months ago and the scraps were enough to make the cuff on the cases.  The other fabric was from my fabric closet so the only fabric I purchased was the fabric for the kids pillowcases and the cuff.  A total of 13 pillowcases!!!!!

I also cut out and finished three more donation quilts.  I love making these quilts and in the process using up some of my stash!  I even have enough batting scraps for the three quilts.  As soon as I quilt them I  will post a picture.

I am going to be spending this week-end cleaning my house.  I have company coming on Monday and didn't want to start too early since from experience, it will just get dirty again.

Well I just wanted to "check in".  Have a great week-end!

Thursday, October 24, 2013

A Finish!


"String Fling" is all finished.  I quilted it with a simple and quick meander.  The quilt is so busy, anything fancy would be lost.  The back is a Kaffe print I got on-line in a great sale.  I am a little disappointed since the print is paint, not weaved in, but it wasn't a problem to quilt (maybe that is why it was such a sale).  At any rate, it will do for a back.    I put a narrow binding of green---again a scrap!  Everything about this quilt was machine---including applying the binding.....so it was FAST!

I have wondered at times why I continue to quilt----can you get enough quilts or better yet, too many? When I see a quilt though made entirely of scraps and to me at least, is beautiful in it's randomness, I decide that I "need" quilting!


***  you can see just a little of Coal.  When I put down a quilt, he absolutely MUST find a reason to walk across it.  In the picture below, you see my grandson's knee.  Why is it so hard to take a picture of JUST the quilt at times :)!

Sunday, October 13, 2013

Completed!

Completed Quilt


Large and Small Circles


Close-Up


Coal Loves the quilt as well!

This quilt really turned out nicely!  I LOVE the circles!  It really made the quilt special I think!  I have to cut the threads that lead from each circle, and because of the high contrast thread, you can see my sew overs, but from experience, once I wash it, it will not be as noticeable.  This is for a 5 year old, and was a "sorta" practice piece, so all in all I think it turned out okay.  I am going to make one "for real"---I think using solids like this.

Hope your Saturday was a great one!

Friday, October 4, 2013

Uncertainty!

Although I am "chatter box" on occasion, I am basically shy and often hesitant.  Since I am a professional in a world that, if I obviously displayed how I really feel, I would be in trouble and not taken seriously, not many people know that.  It comes out though (strangely enough) in my creative side.  I am almost always anxious when it comes to doing something for someone else (like quilting) or even when I am trying something out and no one will really care except of course me.

Several years ago I made a significant financial commitment in getting a Circle Lord quilting system.  I originally did it thinking I would begin quilting "for money", and when I retired, I would have a little extra money to support my expensive habit (quilting).  I talked to "professional quilters" who talked about how much they enjoyed it.  I tried it and hated it---I found it to be a very stressful process.    All it all it wasn't fun at all and I was tired of my feelings being hurt---so I gave it up and only quilt for Diane now!  It just wasn't worth the stomach pain and headaches I was getting.  I still though had this expensive system I needed to at least use for my quilting.

This long story has brought us to this blog post.  I pulled out my system, got out my book, and decided I would use it to quilt the little quilt I was making as a gift.  I am "sorta" using it for practice, since the other thing about me is I hate to use a "practice piece" that will not be used in some way....hence I rarely practice on just pieces of muslin, but rather quilts.  I love concentric circles!!!!!  I got out my circle maker and the picture is what I have at this point.  I am using a blue thread and so you see my "sew overs".  I am "eye balling" the placements, so the design isn't really symmetrical, but I think it is not bad.  I anticipate that by the time I get to the end of the quilt, it will be pretty good!  At any rate, I am proud of myself.  Although I am a bit anxious, I keep reminding myself, that nothing is perfect!  Even prize winning quilt have "oops" areas but that doesn't stop them from being prize winners.  I am really working to "enjoy the process".   It is especially fun since there isn't another person who will be looking for every little imperfection and not appreciating the fact that for this one row of simple circles, it took me over one hour!

You can see the trailing threads as I move from circle to circle, but of course these will be cut once I finish.  One lesson I am learning is when I quilt a "not quite practice" quilt, I will invest in a really fine top thread to decrease the thread build-up and use a color that isn't a great contrast.  I really though wanted to see the stitching so this contrast is fine, plus I really like the looks of it!  "Modern quilting for a modern quilt"!


It is my hope the finished project will not be bad at all!

Well have a great Friday and week-end!

Sunday, September 29, 2013

Bogged Down!!!!

Life has been getting in the way and I have been a really neglectful "blogger".  Every time I have thought of blogging, either it was the end of a very long day, or I had nothing to blog about.

I have been quilting though---I try to make sure nothing stops me from doing that, if only for a few moments a day.  I am making a very time intensive quilt---one I am thinking about entering in a show.  As what often happens when you are doing anything that is time consuming, your brain gets tired after a while, so I decided to relax it by doing something that didn't take a lot of thinking----


It is a string quilt-----I simply went into my string bag and pulled out strings sewing them together in no particular sequence.  I was simply trying to not put two like ones together---they are all different sizes and after sewing them together I then cut them even to make rows.  I found my inspiration on a quilt on Pinterest, although mine is more colorful I think.  At any rate, it will be a sofa quilt---something to wrap up in while watching TV.  I think I will put a flannel backing on it.  I love the looks of it.  I think I will need to add two more rows and I will be finished.  The funny thing is my string bags don't seem any smaller although this quilt should be making a dent in them.  I am not going to cut more, so there will be some repeats, but I really don't mind.


I also finished the quilt for my DD Significant Other's little boy.  I made one for his sister, so really felt I needed one for him as well.  I had a simple pack of 10 inch squares in blues and beiges and put them together on point.  It is a simple quilt, but will do to wrap up in while watching TV.  I think I will quilt it in concentric circles and back it in flannel.


I didn't use a pattern, but mocked it up in EQ6.  It looks very plain now, but I think will look nice quilted.  I am going to use a blue thread to give it a fun look.

At any rate, this is what I have been up to.  The weather is getting cooler here---I really want to dye some more fabric.  I will have to get myself in gear or the weather will be too cool.

Just wanted to check in!  Thanks for "stopping" by!

Thursday, September 5, 2013

Follow-Up----

I washed, dried and ironed my latest hand dyes.  Although the indigo color wasn't as intense, I am satisfied with this first attempt.  I am going to prepare fabric tomorrow for more dyeing while my "pot" is still okay.  I will dip the fabric bundles in at least four times though and see what the results will be.   I wonder what would happen if I added a little salt to the water I wet the fabric in before wrapping?  I also wonder what would happen if I also added a little soda ash?  Soda ash is already added to the pot initially, I don't want to ruin the mixture.  I will "study" on it a little tonight and decide what I am going to do.  What I may do is make those changes to my last batch of fabric I dip so if I ruin it, it will not impact all the pieces I dye.

Anyway---following are the ironed washed pieces that I particularly like.  If you click on the picture you get a close-up and  can see the "texture" much better.


The "solid" piece.  It reminds me of a ice dyed piece.

The piece was fan folded and placed between the two pieces of wood, held together with rubber bands.


Twisted with wide rubber bands attached.


Twisted with large and small rubber bands.

What did I learn?----This fabric has a wrong and a right side!  I will have to be mindful of that as I fold it to make patterns.  It has a "fractured" look.  Almost like ice or glass breaking (the camera doesn't really catch it).  I really like that effect.  That is what makes  the pieces  so interesting I think,  even though the color isn't as intense.  I didn't notice this on fabrics I saw on-line.  I am not sure what I did to make it happen though.  I do know that I notice an almost metallic covering before I washed it.

Well, as I said, I am satisfied with this first attempt.  More to follow!  Oh yea---the shirts also came out nice although like the fabric, the colors are not as intense.  Certainly, I will wear them.  Unfortunately, other than making the pieces into "solids", there isn't anything I can do about it since over-dyeing and maintaining the patterns would be impossible.  I will "live" with these results.


Indigo Dyeing Adventure!

I really enjoy the dyeing process!  It is involved, takes a LOT of time, is messy and sometimes disappointing, but ALWAYS fun and interesting!  There is nothing like (at least to me), taking fabric out of the dye bath and being surprised at what you find!

I love research, and so have been spending some time researching different dyeing techniques.  My "snooping", took me to indigo dyeing.  Clearly as I read, getting the "real" indigo and preparing it for dyeing wasn't an easy task.  You have to use lye----and since I am a nurse (who has witnessed physical disasters from "adventures") with asthma, and a clumsy one at that, I didn't think that was a safe technique for me to try for the first time.  I was going to be doing this alone, and it just seemed a risky venture.  I searched some more and came upon this "kit" for indigo dyeing.


You could purchase it in two sizes, but in reading the contents of each, they honestly seemed to contain the same things, so I opted for the "mini".  The literature said you could dye 15 t-shirts, so I was sure I would have enough "stuff" for my first try.  I couldn't find it at any local stores, so I ordered it from on-line.  In the meantime, I continued my research to make sure I had everything on hand for my first attempt.

You needed a "indigo pot", so I again searched for sources and found that my local Home Depot had just what I needed.


I got the 5 gallon size (actually I got 4) with tops.  They will be great to dye large pieces of fabrics and the little $1 store ones are tearing up.  You must have a bucket (suggested 5 gallon) with a top because it is important to not allow a lot of oxygen to get into your "pot".

The day finally arrived (yesterday) and my kit arrived!  I had a small bolt of PFD fabric that I prepared and tore into half-yard pieces.  I also had some t-shirts left over from a dyeing adventure last summer that I put into my pile.  I purchased new gloves, made sure I had a long stick (you must have that) appropriate for my large "pot" and out into my dyeing studio (AKA the garage) I went.

You really need two people to help you since you must stir and pour the chemicals in at the same time (remember I am clumsy).


This is what is in the kit.  I preferred to purchase better gloves since the ones inside the kit are thin latex.  I didn't want to risk making a hole in my glove and ending up with indigo hands, or worst yet, a reaction to the dye.  There are rubber bands and two pieces of wood as well.  My husband poured chemicals while I stirred (complaining about how bad the smell was) .  Although the directions don't say you have to wear a mask, I did because of my asthma.  I continued to wear it  as I dyed the fabric because the husband is correct, the solution has a horrible smell!  It is a natural dye, but I suppose the reaction with the chemicals make it smelly.


After I followed directions and stirred, I prepared my fabric and shirts.  I used rubber bands, some shapes and clamps--trying to vary the way I folded and secured the fabric to get a variety in dye patterns.

The directions say allow your pot to rest for about 30 minutes.  I think mine was longer but I really wasn't looking at the clock.


I took off the lid and had a perfect "flower", at least compared to the pictures I found on-line, mine look like the one pictured.  The directions say you should scoop the flower into another container.  I tried but didn't get the whole thing, so you have to push the "stuff" aside as you add you fabric or the directions say you will get dark spots on you finished product.

Unlike the other dyeing, you can't just drop you fabric into the pot or let it touch the bottom.  You are suppose to gently lower it into the solution and manipulate it gently keeping everything under the fluid line.  The solution is warm, so this was a very "hot" process and I wished I had turned on a fan before I got started.


When you first remove the fabric, it is a bright green that slowly turns blue with exposure to the oxygen in the air (oxidation).  The directions give you the impression it is an instantaneous process, but it does take time.  If the blue isn't deep enough, you can return it to the solution which I did.  I put all but two of the pieces in twice.  I wanted to see the difference, if any.

After they had set (the directions say 20 minutes) again mine sat longer---until I saw only a little if any green color.  This is where the directions get a little skimpy. It says to rinse, which I did in cool water.  As I unwrapped the pieces I noticed green inside, but it also turned blue with exposure.  I decided to rinse them all and then lay them out on the grass to make sure all the reaction occurred with all the pieces.


This is actually my favorite piece. It was originally a green dyed piece I didn't like.  The solution turned the green a really pretty yellow and then with the indigo, it is really an interesting piece.


  All the pieces lying in the yard.  I dyed one piece a solid indigo----I like the effect, so next time I think I will dye a couple more pieces a "solid".

I found that there wasn't a lot of color run off when I rinsed them as it is with the traditionally dyed fabric.  I hope that means most of the color will stay.  The pieces are wet so I know the color will fade a little in the wash.  The directions say use a "mild" detergent but I used synthrapol like I do with my other dyed fabric.  Some where I read to put vinegar in the final rinse, but I forgot to add it so I will just wait and see since it appears not every one does that and still got good results.  I did put in a couple of color catchers to protect the areas that have white in them.

Well, I am excited about my first venture.  My pot is still good!  When my husband saw the shirts he wanted one, so I am going to Wally World tomorrow and get him a shirt and my grandbabies each one.  I also think I am going to stop at Goodwill and get a white shirt to dye.  It would look smart with jeans I think.

I will let you know how they looked after coming out of the wash, drying and then with a good ironing.